
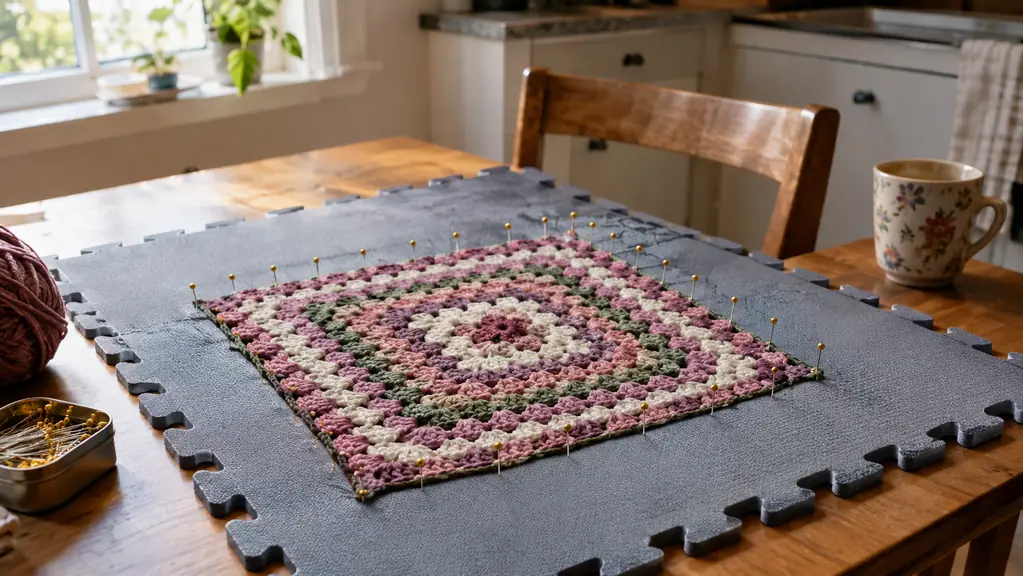
If you have ever finished a granny square blanket and watched the corners curl up like a dried-out leaf, you already know the problem. The stitches are even, the tension felt fine in your hands, and then the finished piece refuses to lie flat. For years I tried to fix it with a hot iron and a damp towel, and for years I got the same mediocre result. Blocking with interlocking mats changed that for me, and it is the method I now use for every granny square and shawl that comes off my hook.
I am Joanne, a retired middle school math teacher in Worcester, Massachusetts, and I have been crocheting for about 30 years. I learned from my aunt, and I still treat every project like a word problem: if the gauge is off by a little, the finished size is off by a lot. Blocking is the step that fixes the math. The KnitIQ Standard 9-pc Set of Blocking Mats is what I keep on my kitchen table for it, and this is exactly how I use them.
The 9 mats that finally made my granny squares lie flat
KnitIQ's interlocking blocking mats give you a 36-inch square of pinning surface that stays put while you work. That is the setup I use for every project in this guide.
Amazon Check Today's Price on Amazon →Step 1: Set up your blocking station
Clear your kitchen table or another flat surface you do not mind getting slightly damp. The KnitIQ mats are foam, so they do not absorb water the way a towel does, and they will not stain your table. Snap the nine mats together in a three-by-three grid. Each mat is about 12 inches square, so the full grid gives you a 36-inch square of pinning surface. That is big enough for a stack of granny squares, a baby blanket, or a small shawl.
I put a folded towel under the grid when I am blocking something large or heavily wet. The towel catches any drips and keeps the mats from sliding on the table. The interlocking tabs on the KnitIQ mats click together firmly, but they are not glued, so the grid can shift if you push hard on it. The towel solves that too. I learned that the first time I blocked a shawl for my church's donation drive and nudged the grid sideways with my elbow while reaching for a pin. The whole piece moved with it, and I had to unpin and start over. Now the towel goes down before the mats, every time.
Gather your pins before you wet anything. I use T-pins with a rustproof coating because they are easy to grip with my right thumb, which gets stiff in cold weather. You will also want a spray bottle filled with cool water, a clean towel for rolling, and a ruler or tape measure if you are trying to match a specific finished size. I keep mine in a small basket on the table so I am not hunting for a pin with wet yarn in my hands.
Step 2: Wet your piece the right way
There are two ways to wet a granny square or shawl, and which one you choose depends on the yarn. For acrylic, which is what most of my donation-drive blankets use, I spray the piece with cool water until it is damp but not dripping. Acrylic does not need a soak, and it dries faster when you start with less water. I count about ten sprays for a 12-inch square, then I smooth it with my palms so the water spreads evenly instead of pooling in one corner.
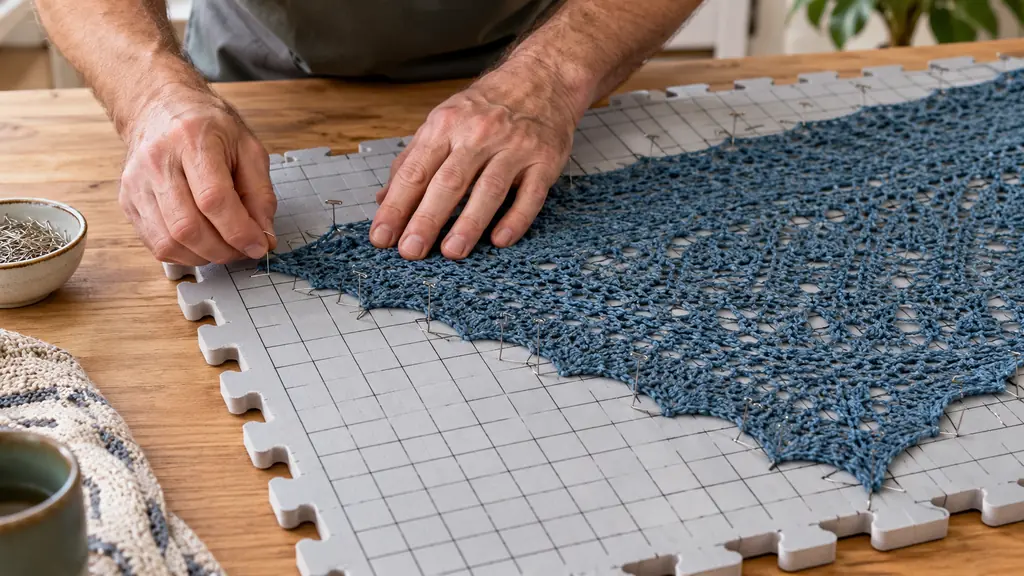
For wool or other animal fibers, I fill my kitchen sink with cool water and a drop of gentle soap, then let the piece soak for about 20 minutes. Cool water matters. Hot water can felt wool and set wrinkles into acrylic. After the soak, press the water out gently in a towel. Do not wring or twist, especially on a shawl with long chains or open sections. Wringing distorts the stitches and can stretch the piece in ways you did not plan. I roll the shawl up in the towel like a jelly roll and press down along the whole length, then unroll it and lay it on the mat.
A note on how wet is too wet: if water pools on the mat, you have too much. The piece should feel damp, like laundry that just came out of the spin cycle, not like something you dropped in a puddle. Excess water slows the drying time and can leave the yarn feeling stiff. On a damp day last spring, I blocked a stack of squares that were too wet and they took nearly two full days to dry, and the centers still felt cool. I unpinned them anyway and the corners curled right back. That is the day I started being honest with myself about how wet is wet enough.
Step 3: Pin to the exact finished size
This is the step where my math teacher brain takes over. Lay the damp piece on the mat grid and start pinning from the center of each side, not from the corners. Pinning the center first splits the difference evenly, so the fabric does not bunch toward one end. For a granny square, I pin the middle of the top edge, then the middle of the bottom edge, then the two sides. After that I work outward toward the corners, easing the fabric gently as I go. I put the first pin in at the center, then measure from that pin to each corner with my tape measure so the two halves come out even.
Use the grid lines on the KnitIQ mats as your ruler. The mats have a printed grid, and I line up the straight edges of my square with the grid lines to keep the corners at true right angles. If I want a 12-inch square, I pin until the edges measure 12 inches on the grid. That is the whole trick: blocking does not just flatten the piece, it sets the size. Last month I blocked a batch of squares for a baby blanket and every one of them measured 12 inches across after drying, which made the joining row come out perfectly straight.
For a shawl, pin the top edge first and stretch it gently to the width you want. Then pin the bottom point and the side edges. Shawls with a lot of drape, like lace patterns, can stretch more than you expect, so check the measurements as you pin and stop when the fabric looks even rather than strained. I once stretched a lace shawl two inches wider than I meant to because I kept tugging at the edge instead of measuring. The grid lines caught it before I pinned the last side, and I was able to ease it back.
Step 4: Let it dry completely, then unpin
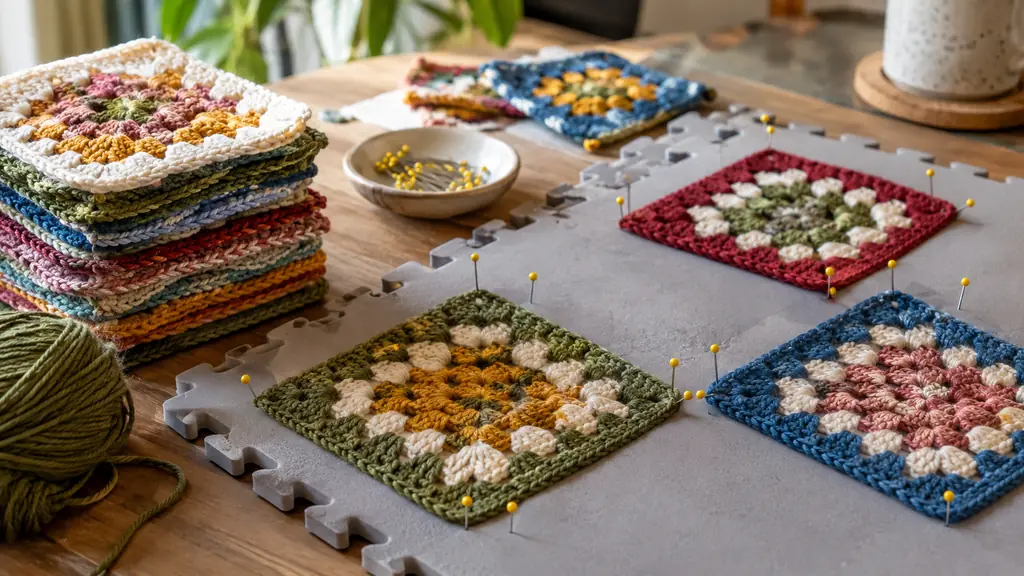
Leave the pinned piece on the mats until it is completely dry. For acrylic, that usually takes overnight in my house. For wool, it can take a full day, sometimes longer in damp New England weather. Do not rush this. If you unpin while the yarn is still cool and damp, the stitches will spring back and you will lose the shape you just set. I test by touching the center of the piece, not the edge, because the center is the last part to dry.
I move the whole grid, mats and all, to a spot out of the way while it dries. The KnitIQ mats are light enough to carry with the pins still in them, which is one of the reasons I prefer them over blocking boards. I set the grid on top of the dryer or on a spare chair near a heating vent in winter, and I let it sit until the fabric feels dry to the touch and looks flat when I lift a corner. In summer I put the grid on the screened porch for a few hours, out of direct sun, and the air does the rest.
When it is dry, remove the pins slowly, starting from the edges and working inward. I pull the pins straight up rather than sideways so I do not snag the yarn. Then I stack the blocked squares and leave them under a light book for a few hours. That extra step keeps the edges from curling again while the yarn relaxes. I use a paperback I am not reading anymore, nothing heavy enough to flatten the stitches, just enough weight to hold the stack in place.
Step 5: Repeat for every square before you sew them together
Block every granny square before you join them. I know it feels like extra work, but it saves you from the worst moment in crochet: sewing together squares that are not the same size and watching the blanket ripple. When all the squares are blocked to the same measurement, the seams line up and the finished blanket lies flat. I learned this the hard way with my first granny square blanket, which had a wave in the middle that no amount of careful joining could fix.
I keep a stack of KnitIQ mats on the table and block in batches of nine, which is exactly one full grid. While one batch dries, I crochet the next batch of squares. That rhythm turns blocking from a chore into part of the project. For a queen-size blanket made of 12-inch squares, I need about 48 squares, so I work through five or six batches over a few days. I write the batch number on a sticky note and leave it on the table, so I know which squares are ready to join and which are still drying.
If you are blocking a shawl, you only do this once, but the same rules apply. Pin it to the size and shape you want, let it dry completely, and do not unpin early. A shawl that has been blocked properly will hold its drape through many wears, and it will look like a different piece than the one that came off the hook. The first shawl I blocked this way was a gift for my sister-in-law, and she asked me what pattern I had used because she did not recognize the drape.
What Else Helps
A few extras make blocking easier. Rustproof T-pins hold better than the thin pins that come with some kits, and they are kinder to your hands. A spray bottle with a fine mist gives you more control than running the piece under the tap. And if you block often, a second set of KnitIQ mats is worth considering, because two grids let you block a whole blanket's worth of squares at once. I also keep a small notebook with the finished measurements of every piece I block, so I can repeat the size next time without remeasuring. For a shawl, I sketch the shape and write the width at the top edge, the depth at the center, and the length of each side. That notebook has saved me more than once when I wanted to make a second shawl in the same size.
Blocking does not just flatten the piece, it sets the size. When every square is pinned to the same measurement, the seams line up and the blanket lies flat.
Set up your own blocking station with KnitIQ mats
Nine interlocking mats, a printed grid for measuring, and a surface that holds pins firmly. That is everything this method needs.
Amazon Check Today's Price on Amazon →